TERMINALLY INSANE
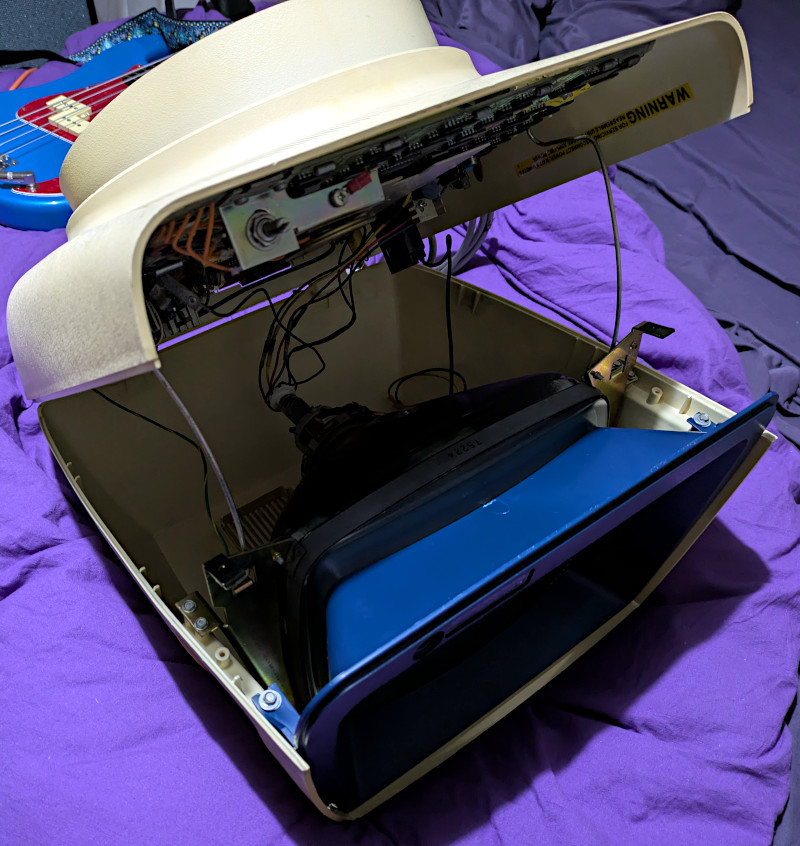
With the success of finally running software on the Nova 3, it made sense that the next step would be to fix up one of the two Dasher D200 terminals I have. Both were taken out of storage and I had to decide which of the two I should work on. Look at this one below and how much dust has caked onto it after almost 20 years in storage. I love how it flips up like a car bonnet revealing the engine, I mean circuit board.
![[Really bad picture of a filthy D200 Dasher terminal]](./img/dirtyD200.jpg)
Ultimately I ended up choosing the least yellowed of the two and started pulling it to bits. It hadn't been powered up in over 25 years but I still stuck an earthed probe under the CRT anode cap to discharge it as a precautuon. No surprise that I didn't hear the crack of a spark. Still better safe than sorry. The CRT was removed, taking note of which wire went where, and put in a safe place.
![[Really bad picture of the CRT]](./img/crt.jpg)
With everything removed, the first thing I did was give the plastic shell a good thorough cleaning in mild detergent. I wasn't after perfection and wasn't going to retro-bright it. Making it look brand spanking new wasn't on the list at all. The terminal wasn't much younger than I am and I have aged. I can't turn the clock back on my age and make myself look youthful so, fuck it, the Dasher can suffer along with me.
![[Really bad picture of the cleaned plastic shell]](./img/shell.jpg)
Okay, let's start working on the keyboard. Seems to look good so far...
![[Really bad picture of the inside of the keyboard]](./img/keyboard.jpg)
As expected, the keyboard was a combination of caked on dust and decaying foil-on-foam pads. I created such a fine powdery mess that seriously screwed with my sinuses. It was pulled to bits and every part was thouroughly washed in warm water with mild detergent, gently scrubbed by an old toothbrush.
![[Really bad picture of the guts of the keyboard]](./img/kbd_guts.jpg)
After it dried and was assembled, it looked pretty good.
![[Really bad picture of the partially assembled clean keyboard]](./img/clean_kbd.jpg)
After some brief celebration came the long and tedious task of gluing in many foil-on-foam pads on the keyboard plungers. I gave each one four tiny dots of glue in a square formation and gently pressed in the pad, slightly adjusting it to be centred, and then moved onto the next one. Rinse, repeat, yawn...
![[Really bad picture of glued pads in the keyboard]](./img/pad_gluing.jpg)
Onto the mainboard! Look at that bloody thing below! See that circuit board in the middle with what resembles a skidmark on dirty underpants? That is an earth shield over the CPU and other sensitive parts that sit DIRECTLY BELOW THE ANODE CAP OF THE CRT! I'm not entirely sure if that skidmark is from the anode cap rubber staining the fibreglass or from HT sparks jumping to ground. Either way, the shield is a fix to prevent the HT killing the CPU and associated components near it.
![[Really bad picture of the Dasher mainboard]](./img/dasher_mb.jpg)
You like burnt stuff? Check out this nifty charred bit on the PCB below where two power resistors meet. That track must've gotten rather toasty in the past from excessive current, so I ended up adding some wire and solder to thicken it up to allow more current to pass safely.
![[Really bad picture of burnt mainboard]](./img/burn.jpg)
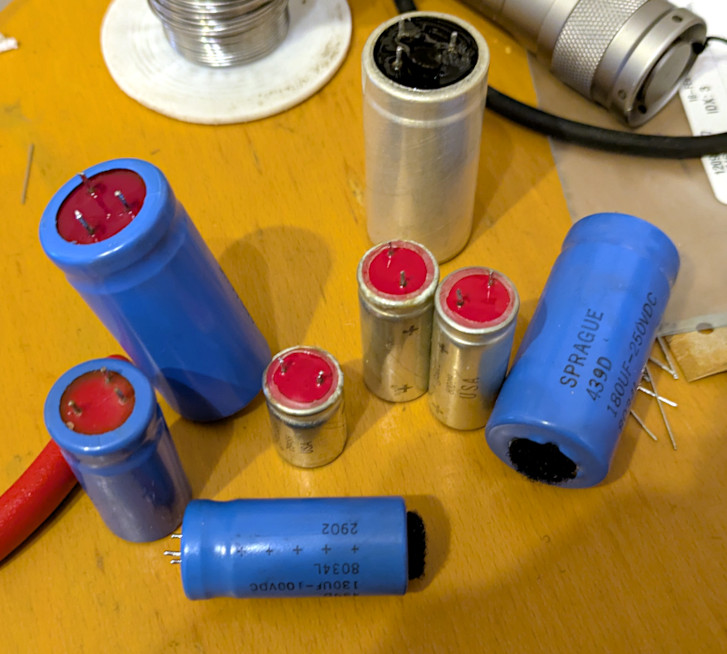
After a good clean, I replaced all the large electrolytic capacitors. All were the same values and voltages as the old ones but were considerably physically smaller.
![[Really bad picture of the mainboard with new capacitors]](./img/mb_newcaps.jpg)
Now it came time to put it all back together. Not gonna bore you with multiple photos of the process so here's the nicest.
It now had come the time to first power it up and I was feeling an equal amount of anticipation as I was fear. I brought it up on a variac with a slow sweep so the new capacitors weren't hit with an instant burst of current. I then turned it off, took it off the variac, and turned it back on. There was no smoke but there was a cursor. Got a bent piece of wire, shorted out pins 2 & 3 on the RS232 port, and started typing. It worked. Every key worked. I then hooked it up to a laptop and sent over some ASCII art.
![[Really bad picture of the working Dasher D200]](./img/horns.jpg)
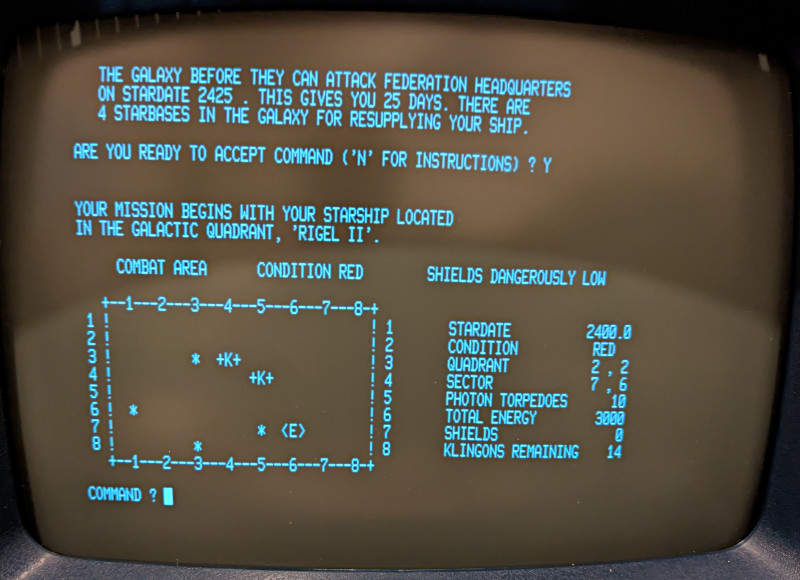
Now the big test - connecting it to the Nova 3. I loaded up Extended Basic using a Linux laptop followed by Super Star Trek. It looks absolutely lovely! Yep, partying like it's 1979!!!
![[Really bad picture of Super Star Trek]](./img/trek-1.jpg)